
Are you ready to take your interior design game to new heights? Wallpapering high ceilings may seem like a daunting task, but fear not! We’ve got you covered with some expert tips to ensure a successful and stunning wallpaper installation. Whether you’re looking to add a pop of color or create a focal point in your space, these tips will help you achieve a flawless finish on those lofty surfaces. So grab your tools and get ready to elevate your home’s style with these tips for wallpapering high ceilings.


Choosing the Right Wallpaper
When it comes to choosing wallpaper for your high ceilings, there are a few factors to consider to ensure a successful installation. One important consideration is the scale and pattern of the wallpaper. For high ceilings, it’s best to opt for larger scale patterns or vertical stripes as they can help to visually bring the ceiling down and create a more cohesive look. Additionally, lighter and brighter colors can make the space feel more open and airy, while darker colors can create a more dramatic and intimate atmosphere.
In terms of materials, it’s advisable to choose lightweight options. This is because high ceilings can be more difficult to work with, and using lighter materials will make the installation process easier. Additionally, lightweight wallpapers are less likely to put strain on the ceiling and will be easier to manipulate and hang.
Another important consideration when choosing wallpaper for high ceilings is selecting options that are washable and durable. High ceilings can be challenging to clean, so opting for a washable wallpaper will make maintenance much easier. Additionally, durable wallpapers will be more resistant to damage and will last longer, ensuring that your investment stands the test of time.
Preparing the Ceiling
Before you can start hanging the wallpaper, it’s crucial to prepare the ceiling properly to ensure a smooth and long-lasting application. The first step is to clean the surface thoroughly. Remove any dust, dirt, or grease using a mild detergent and a soft cloth. This will ensure that the wallpaper adheres properly and will prevent any unsightly bumps or imperfections.
Next, inspect the ceiling for any damages such as cracks or holes. Repair any damages using a suitable filler and sand the area smooth once the filler has dried. Ensuring a smooth and even surface will result in a professional and seamless wallpaper application.
After repairing any damages, it’s time to apply a primer. Primer helps to create a smooth surface for the wallpaper to adhere to and can also improve the wallpaper’s durability. Apply the primer evenly using a paint roller or brush, following the manufacturer’s instructions. Allow the primer to dry completely before moving on to the next step.


Measuring and Cutting the Wallpaper
Accurate measurements are crucial for a successful wallpaper installation, especially when working with high ceilings. Start by measuring the height and width of the ceiling. It’s advisable to add a few extra inches to the measurements to ensure that you have enough wallpaper to work with and to accommodate for any pattern matching.
Speaking of pattern matching, it’s important to cut the wallpaper into manageable strips while also considering the pattern. Measure the length of the pattern repeat and ensure that each strip of wallpaper you cut includes enough additional length to match the pattern seamlessly. This will help to create a cohesive and professional finish.
To cut the wallpaper, use a sharp utility knife and a straightedge for accuracy. Measure and mark the desired length on the back of the wallpaper, then cut along the marked line. Repeat this process for each strip of wallpaper you need.
Laying the Foundation
Before you start hanging the wallpaper, it’s essential to mark a level line on the wall to ensure that your wallpaper is applied straight and evenly. Use a spirit level or a laser level to mark a level line at your desired height. This will act as a guide when hanging the first strip of wallpaper and will ensure that the rest of the installation goes smoothly.
Once you have your level line, it’s time to apply wallpaper adhesive. Follow the manufacturer’s instructions for mixing the adhesive, as different types of wallpaper may require different ratios of adhesive to water. Apply the adhesive to the back of the wallpaper using a paint roller or a pasting brush, making sure to cover the entire surface evenly.
After applying the adhesive, start wallpapering from the corner of the room closest to a window or door. This will make it easier to match patterns and ensure a visually pleasing finish. Carefully align the edge of the first strip of wallpaper with your marked level line, then press it firmly onto the wall, smoothing out any air bubbles or wrinkles as you go.

Hanging the Wallpaper
With the foundation in place, it’s time to start hanging the wallpaper. Unfold the first strip of wallpaper gently, taking care not to crease or damage it. Align the top of the strip with the marked level line on the wall and gradually lower it, smoothing it out as you go.
As you hang each strip of wallpaper, it’s important to smooth out any air bubbles or wrinkles. Use a wallpaper brush or a wallpaper smoother to gently push out any trapped air and ensure a smooth and seamless finish. Work from the center of the strip outwards, being careful not to stretch or distort the wallpaper.
If your wallpaper has a pattern, it’s crucial to match patterns carefully as you hang each strip. Take your time to align the pattern accurately, ensuring a cohesive and visually appealing result. Double-check the alignment before pressing the wallpaper firmly against the wall.
Dealing with Difficult Areas
While wallpapering high ceilings, you may come across some challenging areas that require special attention. One such area is around light fixtures. To work around light fixtures, turn off the power and carefully remove the fixture. Cut your wallpaper strip to fit around the fixture, leaving a small overlap for neat trimming. Once the wallpaper is in place, reinstall the fixture and turn the power back on.
Navigating corners and edges can also be tricky. When wallpapering around corners, allow the strip of wallpaper to slightly overlap onto the adjacent wall. Smooth out any air bubbles and trim the excess wallpaper neatly at the corner using a sharp utility knife. For edges, measure and cut the wallpaper strip to fit precisely, ensuring a clean and seamless finish.
In the case of uneven surfaces, such as textured walls or beams, it may be necessary to use additional adhesive or a thicker wallpaper to ensure proper adhesion. Consult with a professional or the wallpaper manufacturer for guidance on handling uneven surfaces.
Seamless Wallpaper Application
To achieve a seamless wallpaper installation on high ceilings, it’s important to ensure proper overlap of the wallpaper strips. When hanging each strip, carefully align the pattern and slightly overlap the edges. Use a wallpaper smoother to press the overlapping edges together, removing any excess adhesive or air bubbles. This will create a seamless transition from one strip to the next.
Additionally, using a wallpaper smoother throughout the installation process can help achieve a professional finish. Gently glide the smoother over the wallpaper, starting from the center and working towards the edges. This will ensure that the wallpaper is securely adhered and free of any imperfections.
While smoothing the wallpaper, it’s important to periodically check for excess adhesive and trim it away neatly. This will give your wallpaper installation a clean and polished look.
Creating a Professional Finish
Once the wallpaper is hung, it’s time to inspect for any imperfections. Carefully examine each strip for any visible seams, air bubbles, or other issues. If you notice any imperfections, gently lift the affected area and apply additional adhesive to smooth it out. Use a wallpaper smoother to press the wallpaper back into place and remove any air bubbles.
To ensure a seamless finish, touch up any visible seams by gently reactivating the adhesive and smoothing the wallpaper together. Take care not to damage the wallpaper or stretch it while doing this. By addressing any imperfections promptly, you can achieve a professional-looking wallpaper installation.
After completing the wallpaper installation, it’s important to clean up any excess adhesive that may have seeped out from the edges of the wallpaper. Use a damp cloth or sponge, making sure not to wet the wallpaper too much. Wipe away any adhesive residue and allow the wallpaper to dry completely before moving on to the next step.
Taking Safety Precautions
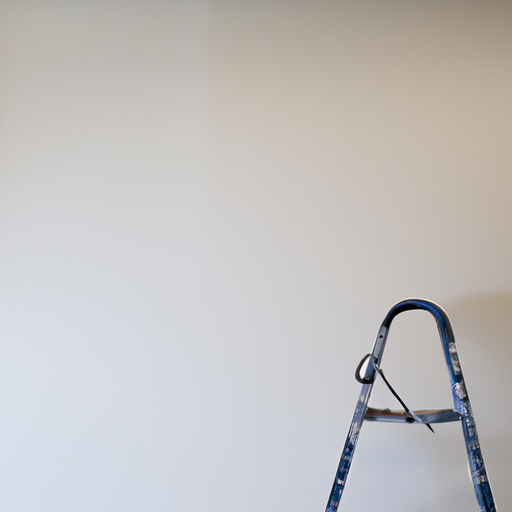
When working with high ceilings, it’s important to prioritize safety. Use sturdy scaffolding or a ladder that is appropriate for the height of your ceilings. Ensure that the scaffolding or ladder is stable and secure before climbing onto it.
Having a spotter or an assistant can also be helpful, especially when working with larger strips of wallpaper. They can help hold the wallpaper in place while you smooth out air bubbles or ensure the pattern is aligned correctly.
Lastly, don’t forget to protect yourself with gloves and goggles. Gloves will not only provide protection for your hands but also help to prevent any fingerprints from getting onto the wallpaper. Goggles will protect your eyes from any potential debris or adhesive splatters.
Maintenance and Care
Once your wallpaper has been successfully installed, it’s important to maintain and care for it properly to ensure its longevity. One key piece of advice is to avoid excessive moisture in the room where the wallpaper is installed. High humidity levels can cause the wallpaper to peel or warp over time. Consider using a dehumidifier or ensuring proper ventilation in the room to prevent any moisture-related issues.
Regular cleaning is also important to keep your wallpaper looking its best. Use a soft brush or a dry microfiber cloth to gently remove any dust or dirt from the surface. Avoid using water or any harsh cleaning products, as these can damage the wallpaper. If there are any stains or damages, address them promptly by consulting the manufacturer’s guidelines for cleaning or repairing the specific type of wallpaper you have.
By following these tips for wallpapering high ceilings, you can achieve a professional and visually stunning result. From choosing the right wallpaper to properly preparing and hanging it, each step is important in creating a beautiful and durable finish. Remember to take safety precautions, maintain the wallpaper, and enjoy the beauty it brings to your space. Happy wallpapering!
